 Today was the last day of our weekly homeschooling get-togethers, making advent crafts and reading advent books.
It is MANY thanks to Kara, for designing this O Antiphon Wreath craft for us all, which will allow each family to showcase each day's O Antiphons which starts tomorrow (17th)
The wreath I worked on with my children is meant to represent the christmas flower, the poinsettia.
 Kara bought paper plates for the wreath itself and the center was cut out. (The template for the stars were made out of the cardboard from the cut-out center.)
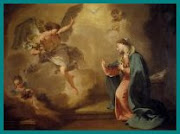
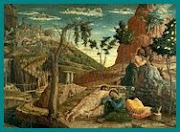
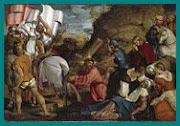
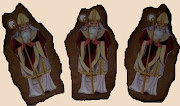
 We went internet searching for some lovely O Antiphon images and we found some that were perfect for this craft....it came from Jenn's article over at Catholic Culture, excellent!!
 Then they were stuck in the center of the white circles. The circles need to fit perfectly inside the the red stars you will see below.
 To give the centers the look of a poinsettia center, a single hole puncher was used to create a lovely edge.
 Here are the stars, for each wreath you need 7 red and 7 green- above you can see the white cardboard star stencil.
 Next the green and red stars needed to pinned together and then attached to the wreath. Special pins that fold back behind to attach them securely to the wreath were used.
 Here is ds (14) flattening the pin at the back, securing the poinsettia flower to the wreath.
 It was getting late in the afternoon, so we went outside for bettter light where the poinsettia flowers were all pinned to the wreath.
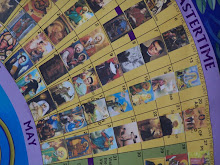
  Each center had the English and Latin Antiphon written around the image.
 Then the poinsettia centers were glued in the middle of each red flower, starting with "O Wisdom" going around until....
 ...they were all finished with the glueing of "O Emmanuel".
 All the red petals were folded into the center like so.
 A bow and curling ribbon is all that is needed now to finish the craft. Punch a hole with the hole punch just to the left of your 'O Wisdom' poinsettia flower.
 After making the bow, the ribbon was threaded through the back of the bow.
 The ribbon with the bow attached, is then threaded through the hole and tied at the back. The two long ribbon strands are tied together at the top to make a hanging loop.
 All done, the children are now eager to count down the last remaining days of Advent with the opening of each poinsettia flower, the reading of the daily antiphon verse and the singing of O Come, O Come, Emmanuel.











































12 comments:
I don't care that my kids are mid-teens, Anne - we're going to make one! This is beautiful! :-)
I love this, Anne. I'm sending my oldest to the craft store today to make one with the kids. Thanks so much.
We're making this one right now! Thanks Anne!
+JMJ+
Anne, you are so creative! =D I love this wreath!
Followed you from the forums,,this is beautiful! I don't think I can pull this together today, but I'm going to save it for next year for sure!
We're done, Anne. It looks great! Thansk for sharing.
Beautiful, Anne!!! Love it!
Beautiful craft Anne!
What a wonderful idea! I really like how simple this is to prepare and how little space it will take up when done. I'm definitely going to include this in this year's advent. Thanks for sharing it!
Haha! In my other comment I said I'd be featuring also your altoid project... well, that's from Waltzing Matilda :-)
What I meant to say is I will also be featuring your poinsettia wreath! ;-)
Thanks so much for sharing your creative with all of us. We just completed our O Antiphon wreath and it looks great! I linked it back to this post if that's okay.
http://sowingmustardseeds.blogspot.com/2009/12/o-antiphons.html
Merry Christmas,
Sue
I know I'm posting this way after the fact, but had to come back and say how much my CCD class enjoyed this project! I saw it on Catholic Icing and loved it right away. It's a great way to give more meaning the the song we sing so much in Advent, "O Come, O Come Emmanuel". The 2nd graders really "got it"!! THANKS!!! ~ Kathy
Post a Comment